Using Custom Script for Harness Database DevOps
Overview
In certain Database DevOps workflows, users may prefer or require a custom script to retrieve and manage their Liquibase changelog rather than using a connector or direct integration.
This guide provides a comprehensive overview of how to use a custom script for Database DevOps, including the creation of a DB Schema, deployment of the schema, and the use of pipeline variables.
Use Case
This guide supports the following scenario:
- The customer maintains a Liquibase changelog in a remote repository (e.g., GitHub, JFrog). This is particularly useful when the changelog is stored in a repository for which Harness does not provide a native connector.
- They want to download and extract this changelog dynamically via a custom shell script.
- The script can reference pipeline variables, such as build versions or access tokens.
Before proceeding, ensure you have set up a Docker Registry Connector to define the custom base image used in your pipeline. Follow the official Harness documentation to configure this connector.
Step by Step Guide
By following these steps, you can effectively manage your database changes and streamline your DevOps processes.
Create a DB Schema
- Under
Database DevOpsin the Harness UI, navigate toDB Schema. - Click on the
Add New DB Schemabutton.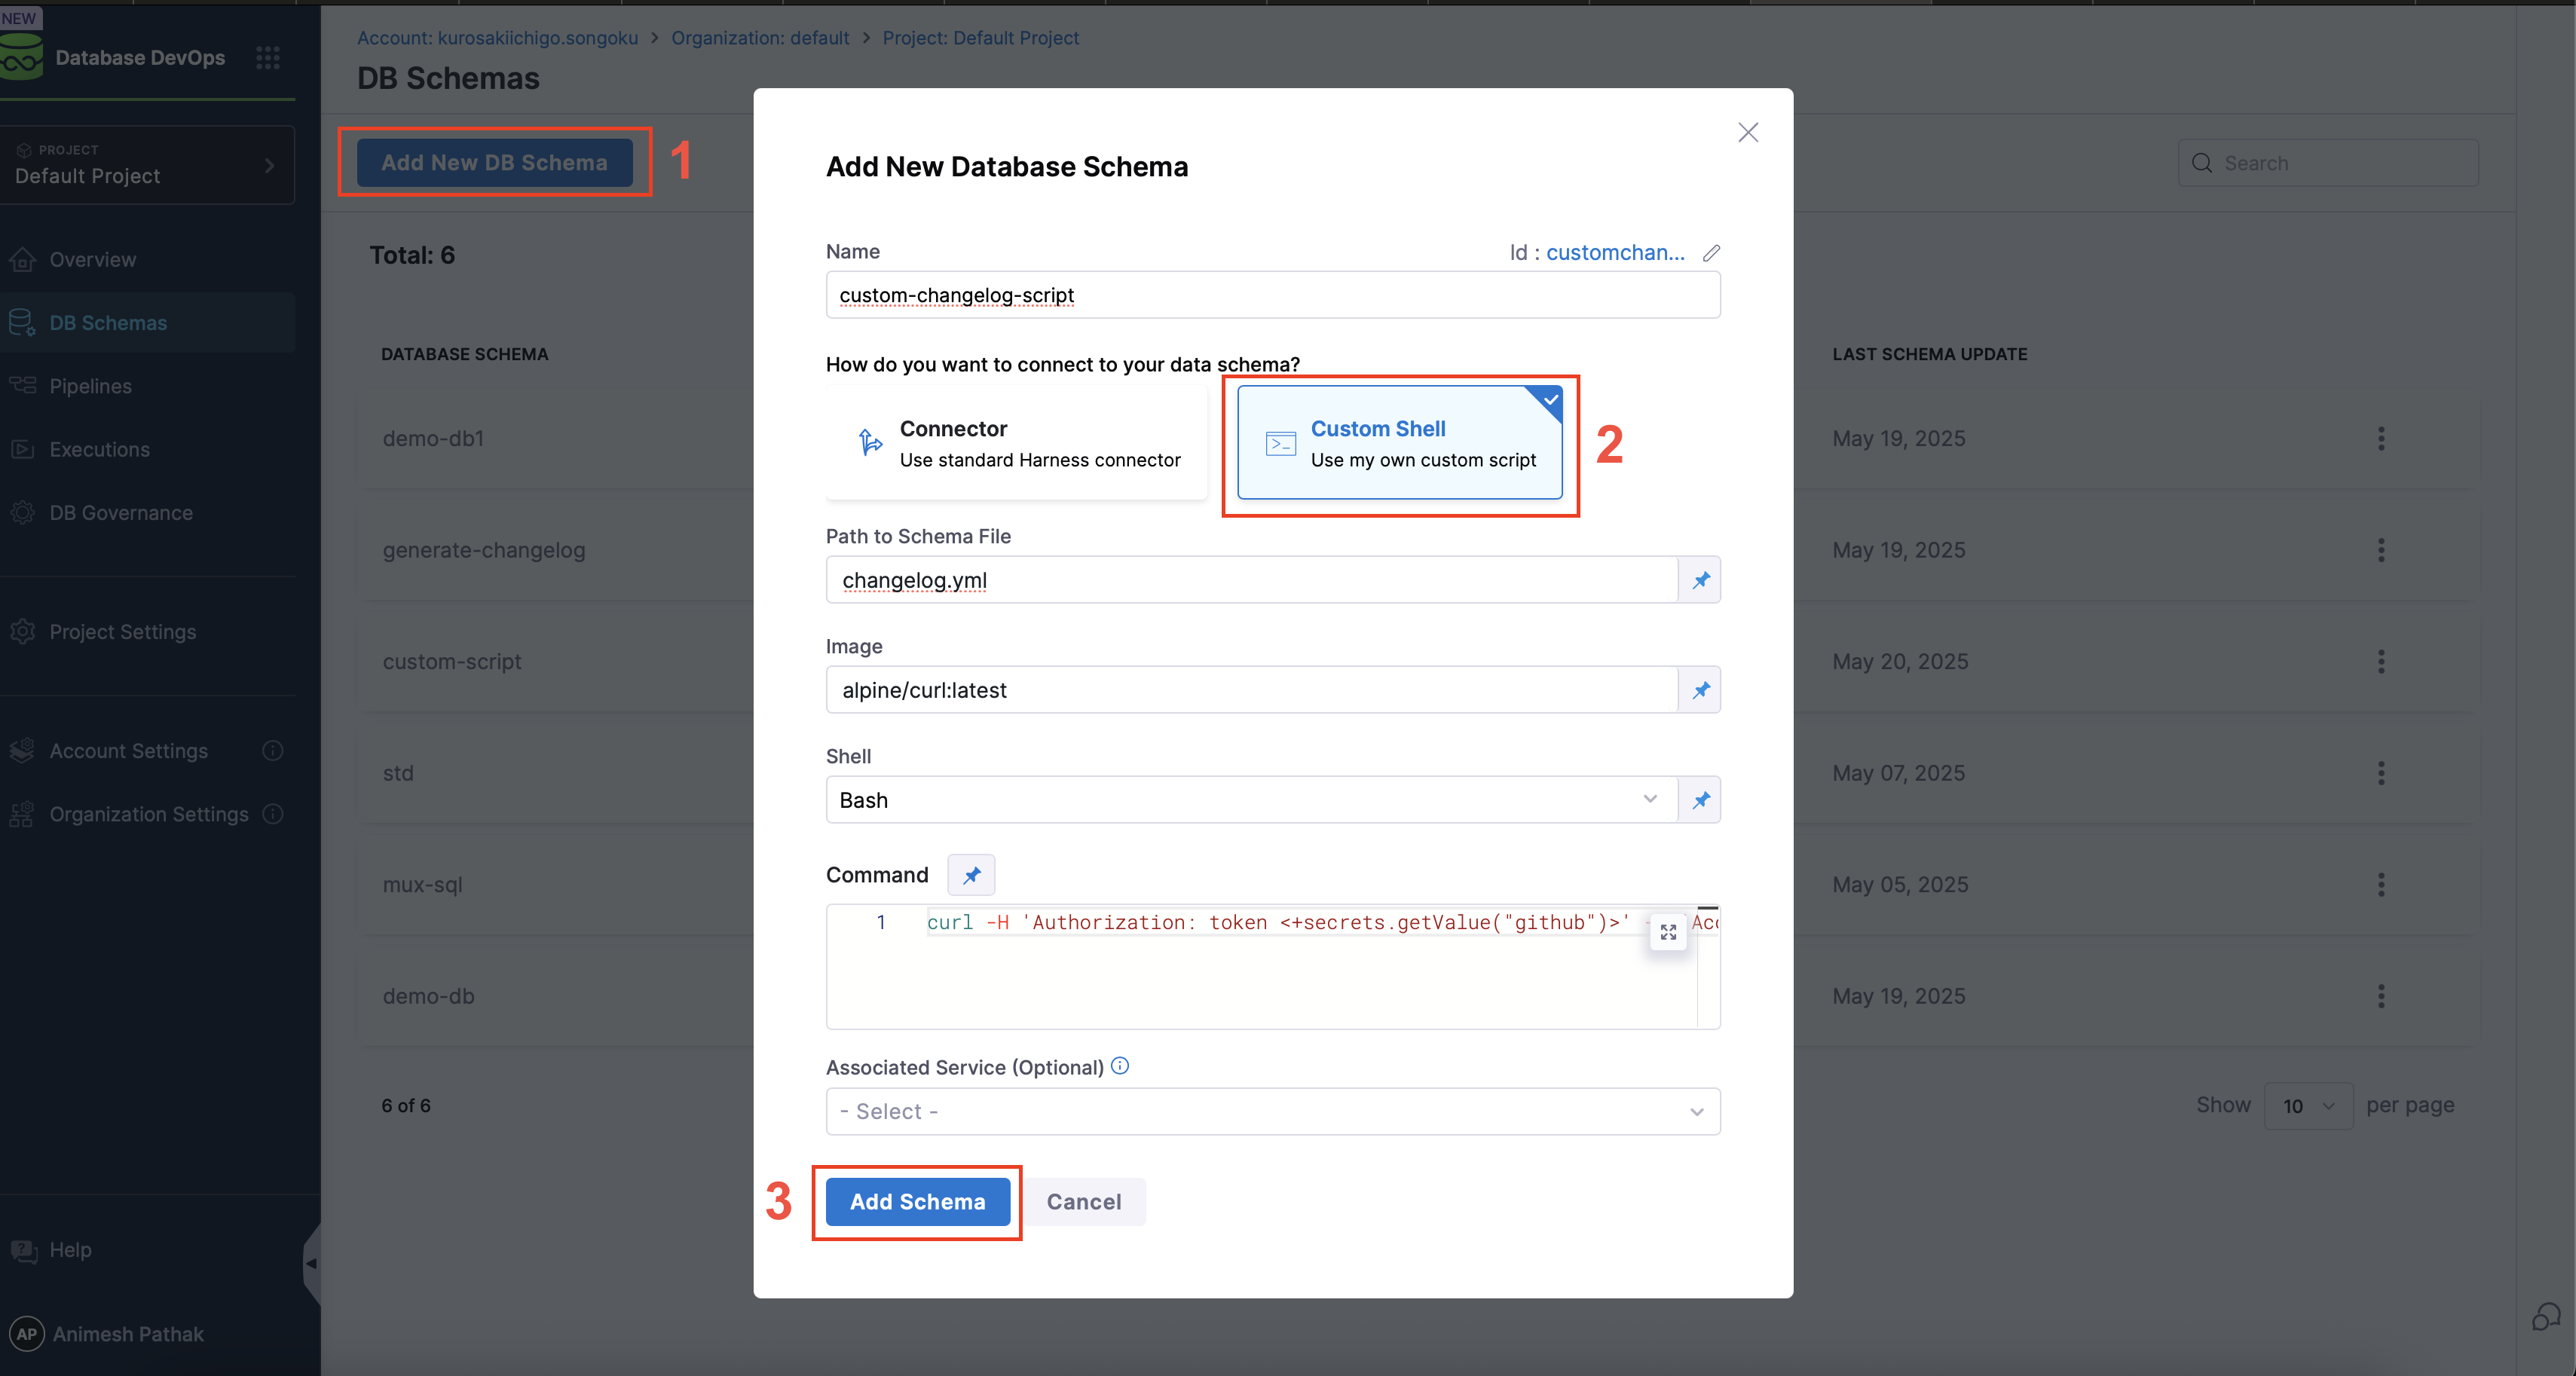
- Connect to Data Schema: Connect via Harness Connector or use a custom script to connect to the database schema stored in a remote repository.
- Schema Path: The path to the schema file in the repository. This is where the custom scripts writes the changelog files that DB DevOps should use during pipeline execution.
- Image: The Docker image to be used for the custom script. This should be a base image that has the necessary tools and libraries installed to execute your script.
- Shell: The shell to be used for executing the script. This can be
bashorshwhich are supported by the Docker image. - Script: The custom script that will be executed. This script should include the logic to download and extract the changelog file from the remote repository. For example:
curl -H 'Authorization: token <+secrets.getValue("github")>'
 -H 'Accept: application/vnd.github.v3.raw'
-L https://api.github.com/repos/Sonichigo/mux-sql/contents/liquibase.yml?ref=main -o changelog.ymlinfoIf your custom script requires variables or parameters, you can reference them using JEXL expressions. For example, you can reference file secrets securely by their ID. Learn more about referencing file secrets. To learn how DB DevOps supports runtime secrets specifically, see the Runtime Secrets guide.
- Click on the
Savebutton. - The DB Schema will be created and you can see the details in the UI.
- Select the
DB Schemaand Click on theAdd New DB Instancebutton.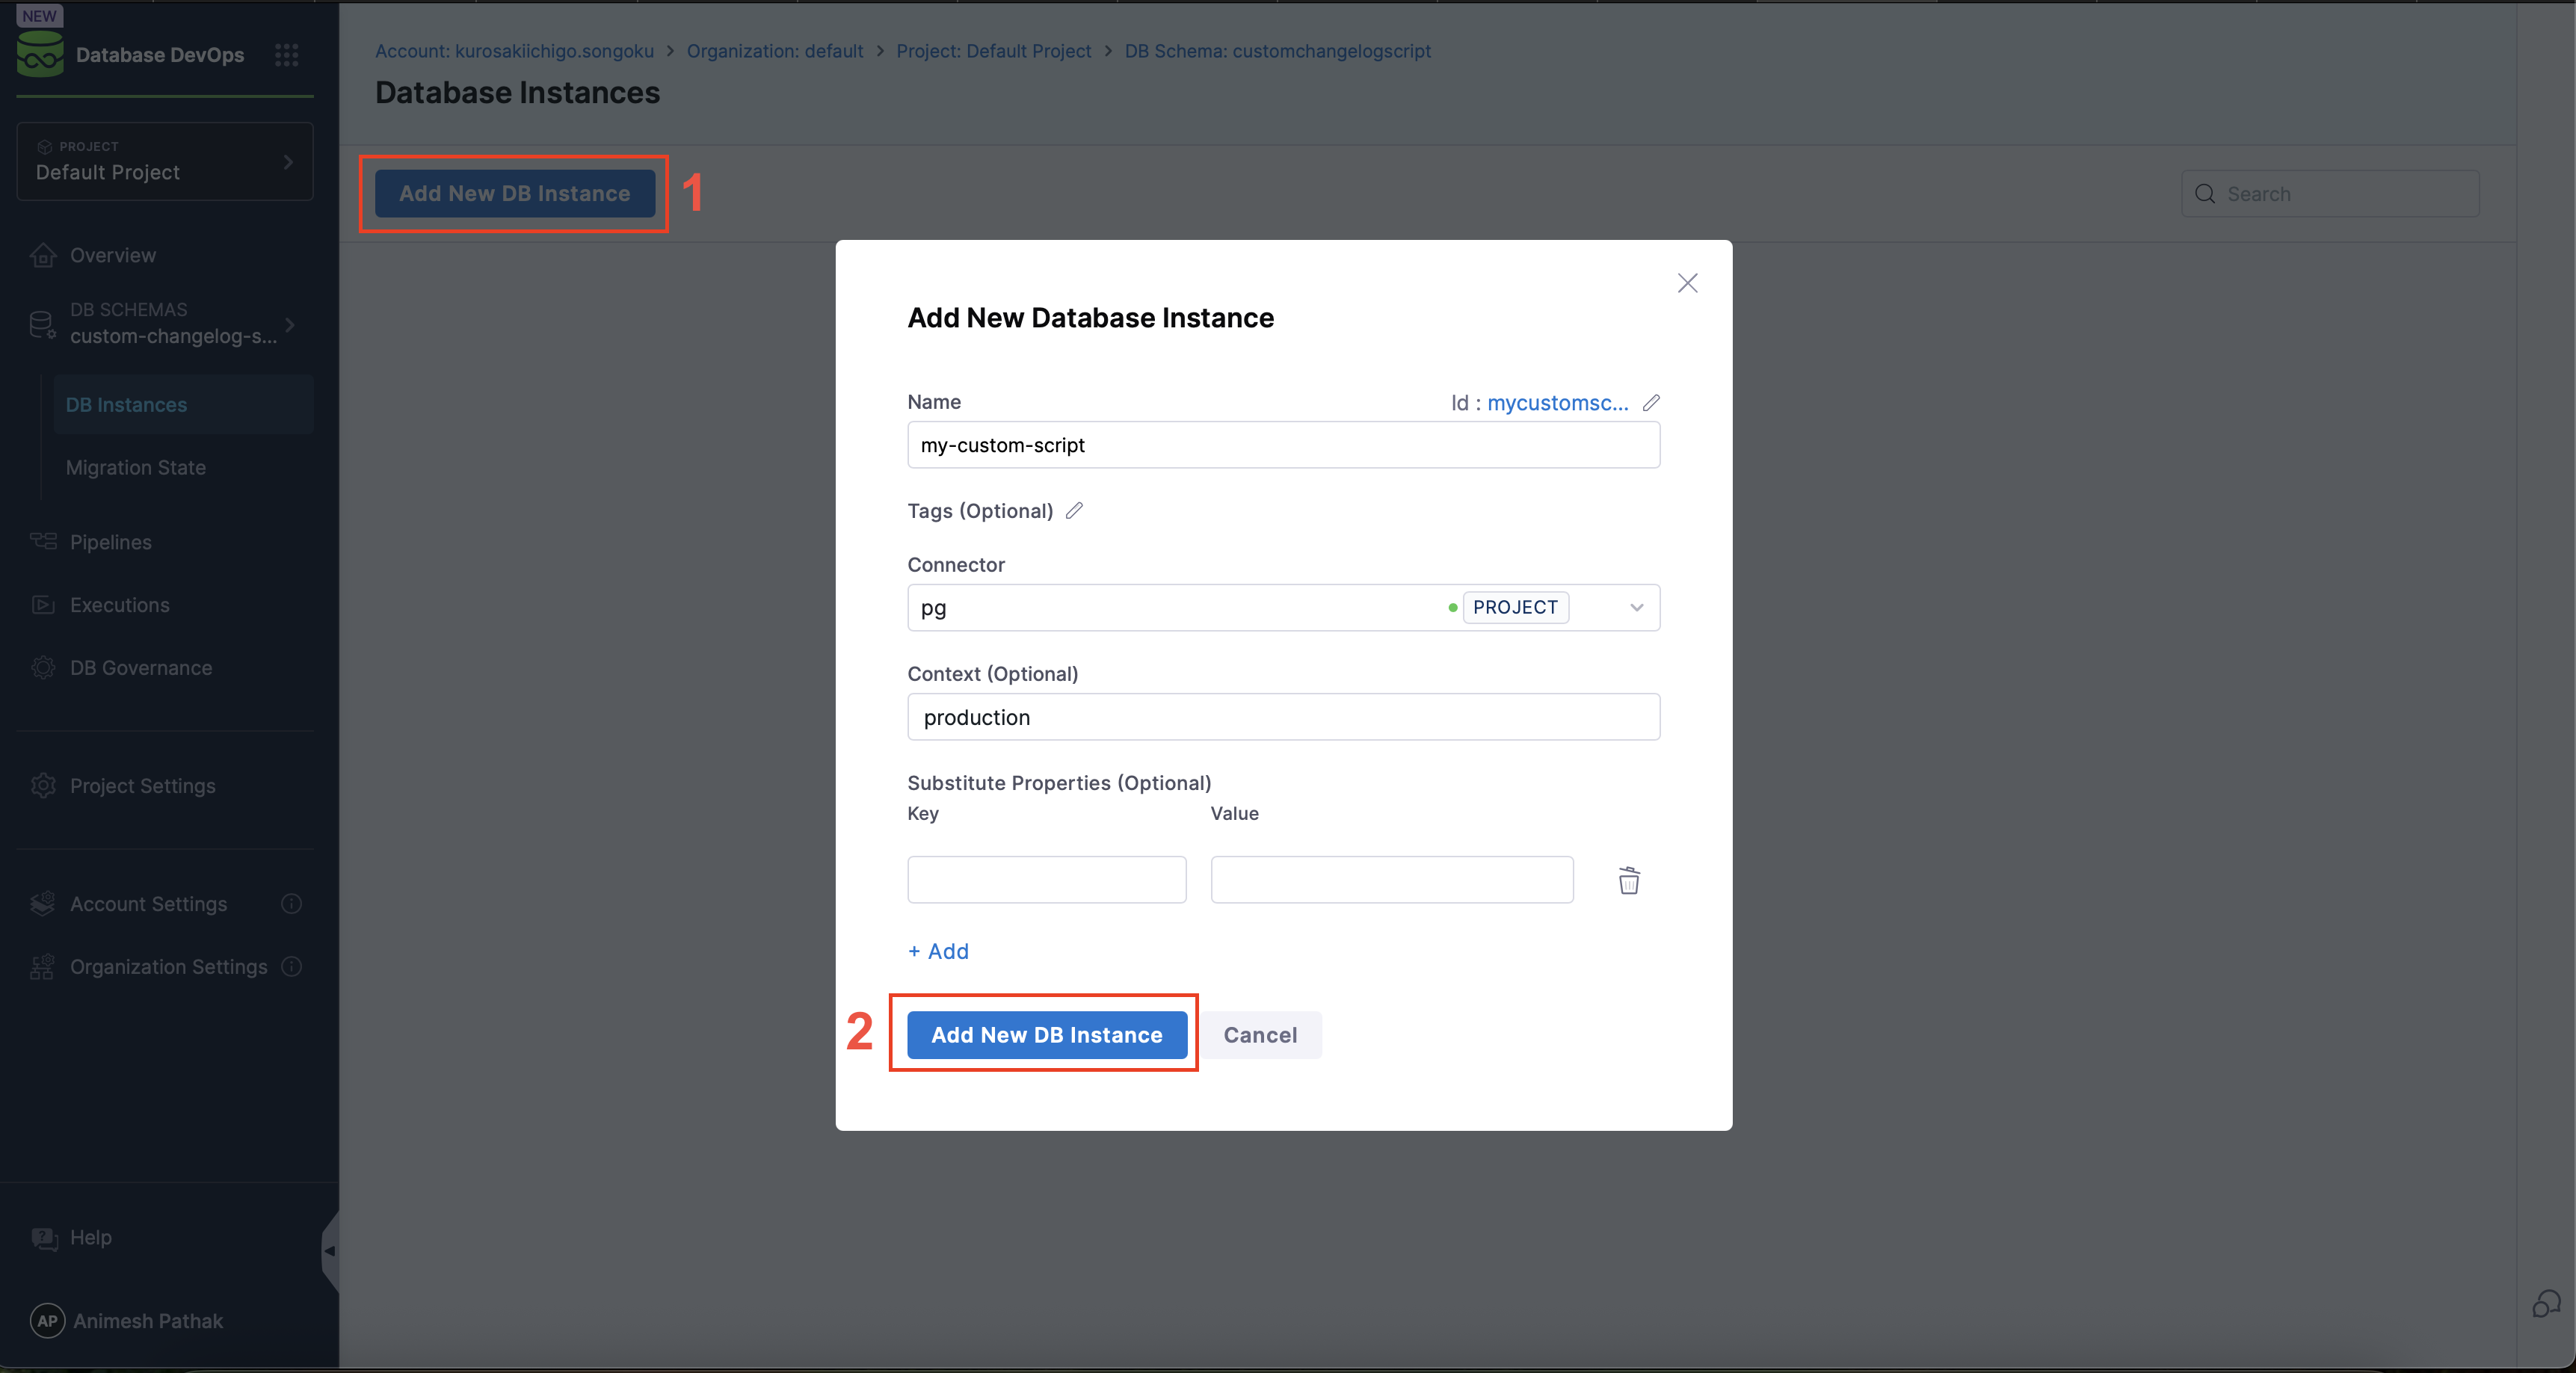
- Name of DB Instance: The name of the DB Instance. This is the name that will be used in the pipeline to refer to this DB Instance.
- Tags (optional): Tags to be used for the DB Instance. This can be used to change which instances are shown on the migration state dashboard. If left blank, the tags will be automatically generated.
- Connector: The JDBC Connector to be used for the DB Instance. This is the connector that will be used to connect to the database instance.
- Context: The context is used to control which changelogs are deployed to which environments. This is useful when you have multiple environments (e.g., dev, test, prod) and you want to deploy different changelogs to each environment.
Deployment Pipeline
- Under
Database DevOpsin the Harness UI, navigate toPipelines. - Click on the
Create a Pipelinebutton. - Click on the
Add Stagebutton and selectcustom stage. - In the
Stagesection, createAdd Step Groupas the stage type.
Toggle on the "Enable container based execution".
- In the
Step Groupsection, selectAdd Stepas the step type. Under "DB DevOps", selectApply Schemaas the step type.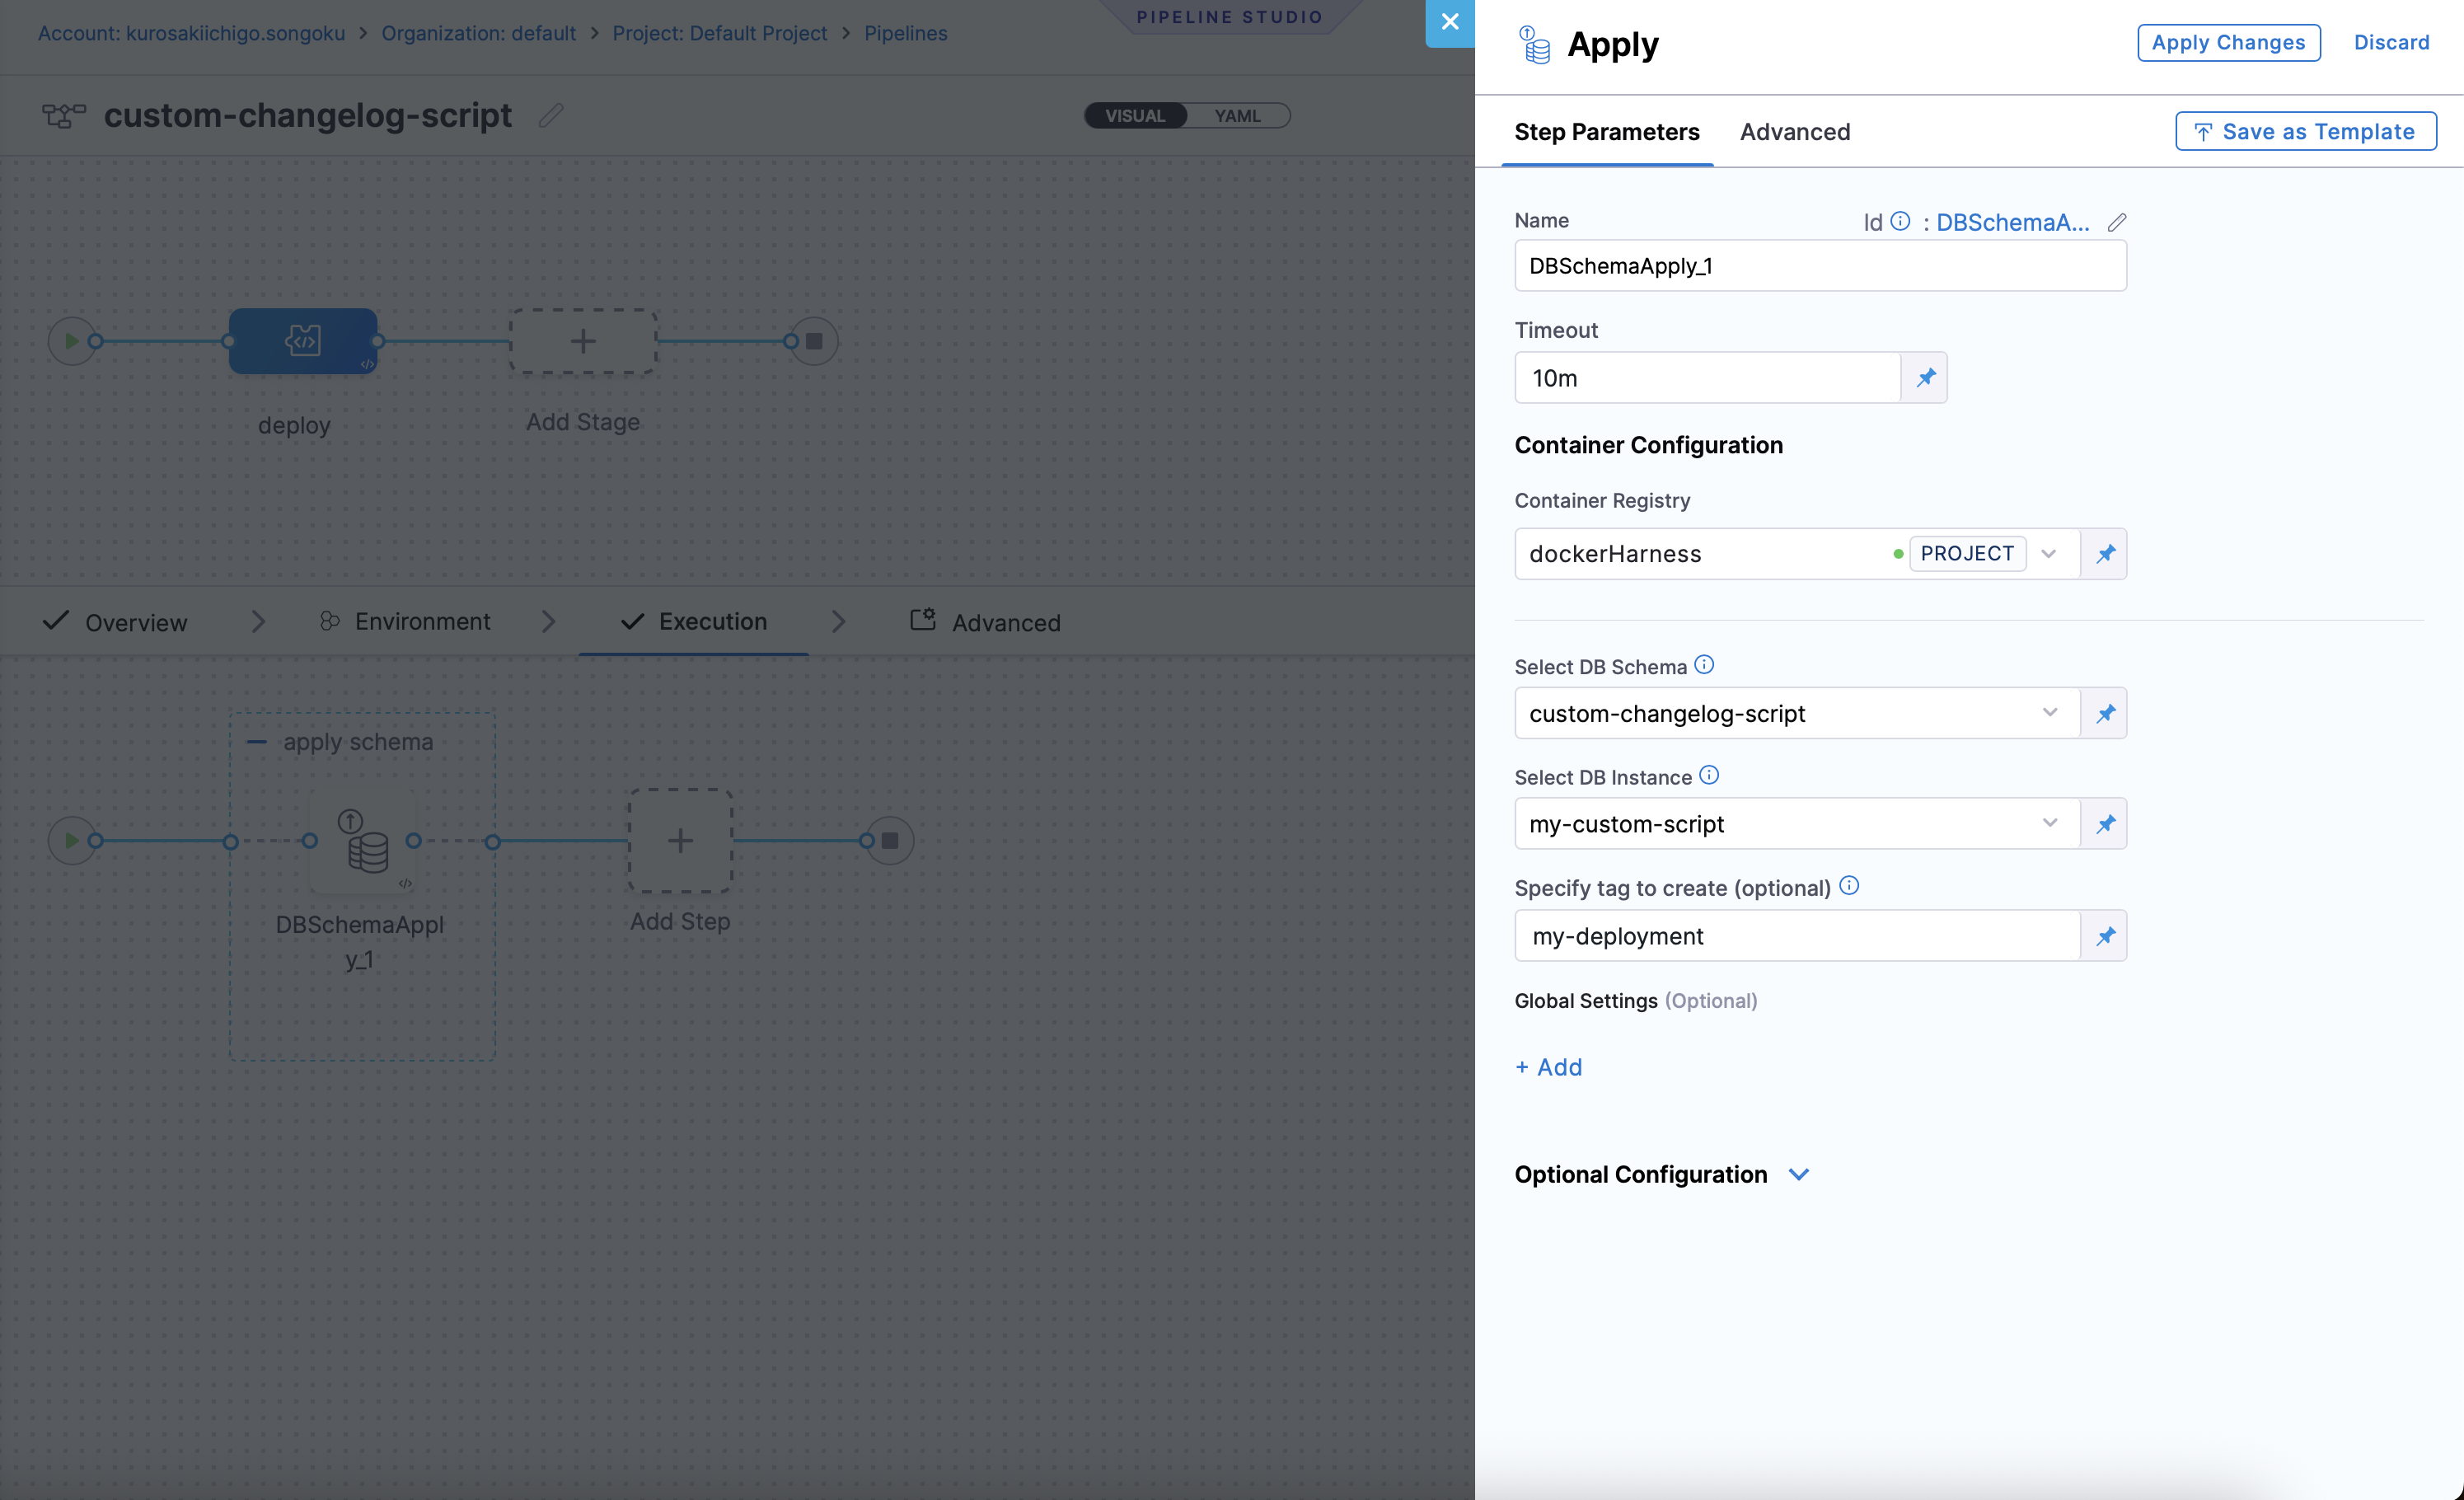
- Select DB Schema: The DB Schema we created earlier.
- Select DB Instance: The Name of the DB Instance, which was created earlier in our DB Schema.
- Tags (optional): Tags to be used for the DB Instance. This can be used to identify the DB Instance in the pipeline. If left blank, the tags will be automatically generated.
- Click on the
Apply Changesbutton, and then click on theSavebutton. - The pipeline will be created and you can see the details in the UI.
- Click on the
Runbutton to run the pipeline.
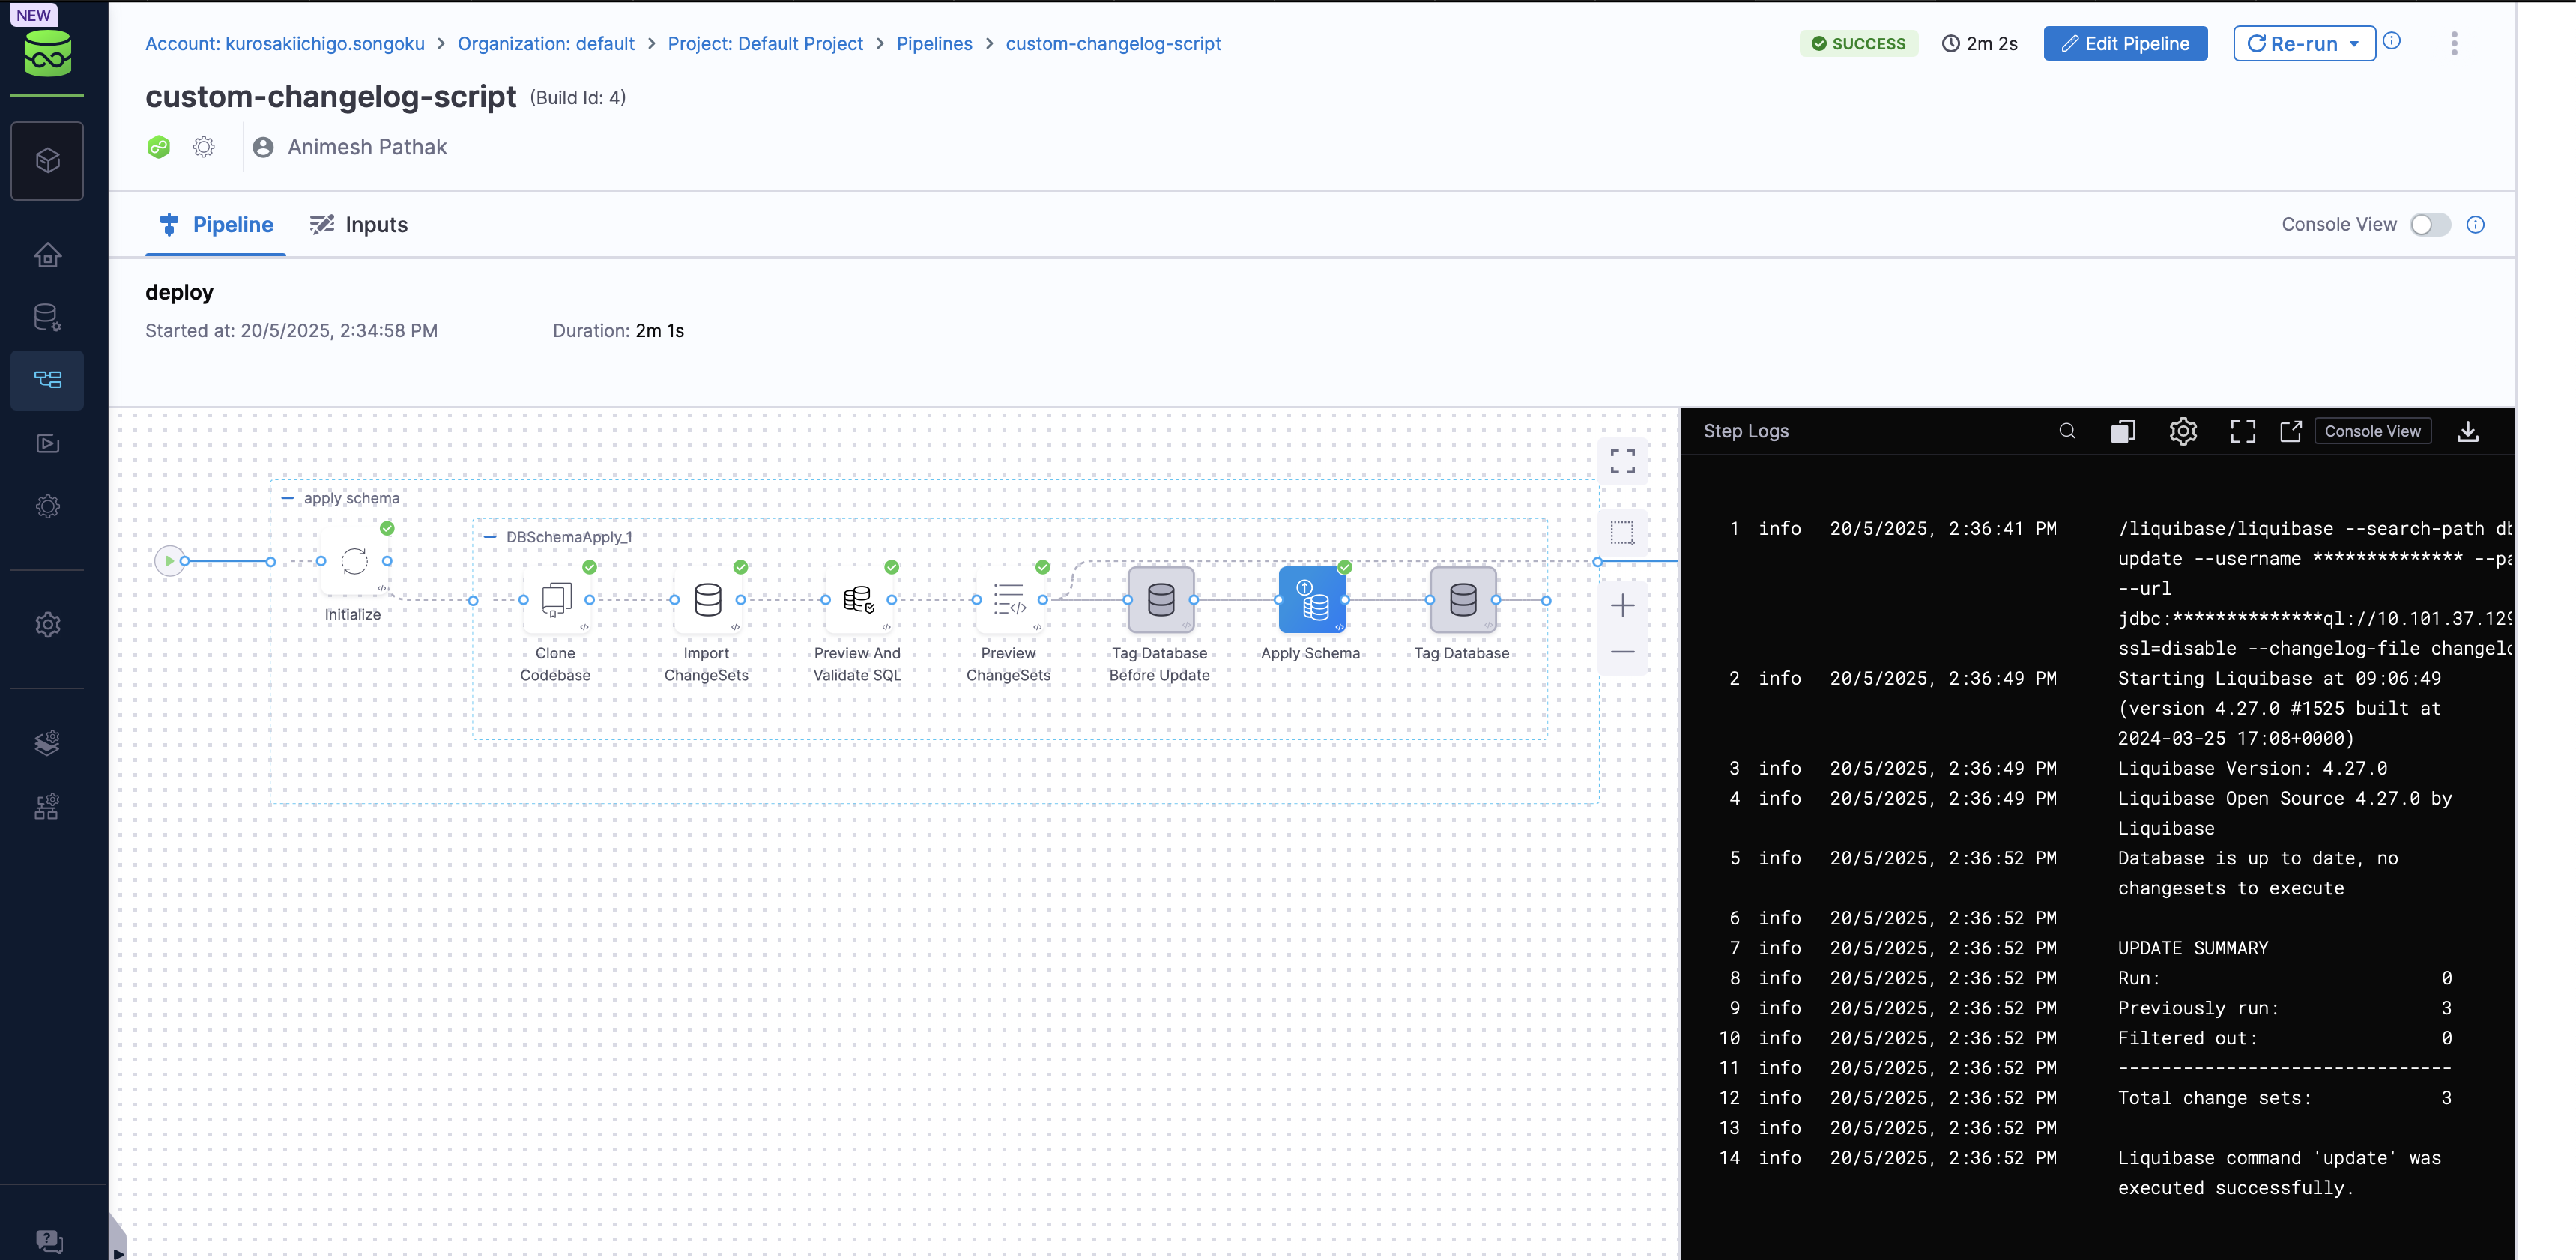
That's it! You have successfully created a DB Schema and deployed it using a custom script. You can now use this pipeline to deploy your DB Schema to the database instance.